How to Install and Play League of Legends on Chromebook
So you want to play League of Legends on your Chromebook.This guide gets pretty complex at parts, so it’s recommended that you take it slowly and don’t rush.
It also involves some degree of coding and a basic knowledge of computers (don’t worry about the code- it’s all ready for you to copy and paste).
If you don’t League running on your Chromebook the first try, it could work on the second. Or third. You may have to tweak the settings and play around until you connect all the dots to get the game installed and running.
As a side note, this won’t work for every Chromebook. Some models out there just don’t seem to work and League of Legends just refuses to run- even with the same hardware and OS. It’s very bizarre.
But then again, we’re trying to get a game to run on an OS that wasn’t made to support it in the first place, so we’re bound to run into problems.
And another note, you should definitely Installing LoL on your Chromebook requires a Powerwash, which basically will delete all your local data. Your Google Account is fine, but your stuff saved on your laptop’s hard disk will be deleted. We’ll cover this again later and I’ll remind you when to back up your stuff.
Okay. That’s enough rambling. I’m sure you’re anxious to play the game already.
We’ll go over some basic hardware needs, then the actual installation, then some tips to boost performance, and then some troubleshooting pointers if you can’t get it to work.
Ready to play some League of Legends on your Chromebook?
Let’s roll.
Basic Hardware Requirements
Can a Chromebook run League of Legends? Can it play it? Can it even install it?
To answer these questions, we’ll have to break it down to the specific hardware requirements to run the game.
As stated earlier, this process won’t work for all Chromebooks. That’s why we need to go over hardware requirements.
Your laptop needs to meet only one basic requirement to install and run League:
It needs to be powered by an Intel CPU.
That’s the bare-bones minimum. You can check what processor your Chromebook has by looking for an Intel sticker somewhere on the frame. If you don’t see one, look on the bottom panel for the manufacturer’s sticker. It should list all the components used. Look for the Intel logo or text.
If you have an Intel-based Chromebook, you probably have one of the following CPUs:
They should all be compatible with the purpose of this tutorial. If you have something else that’s branded by Intel, don’t worry. You’re good. As long as it’s Intel, you should be okay for the majority (unless you have a really, really old Chromebook that’s dated).
You should be good to go
The majority of Chromebooks are powered by Intel processors, but a few have Rockchip or MediaTek CPUs. If you own a Samsung or Asus you may have one of these processors. Samsung has a few , and Asus has a few Also, the so watch out for that one too. There are also a few other odd ones out there that won’t work as well.
Here’s a few of them. The following processors are not compatible with this guide:
Again, you can check your processor by looking for a sticker on the frame next to the touchpad, or underneath the laptop. If you really don’t know, then just look up your specific model and get the specs online.
The only other hardware requirements to get League running is strictly for performance.
Obviously, the more RAM and storage you have, the better. The game will run at about 20-30 FPS with a basic 2GB RAM with an Intel Celeron processor. A lot of newer Chromebooks now come with 4GB of RAM and more powerful processors, so you can expect better FPS.
(We’ll cover how to increase performance and FPS later in the guide.)
Storage is another thing in its own right. The bare-bones minimum storage capacity for a Chromebook is 16GB. They all run SSDs, which is good for fast read and write speeds (which means a less laggy game). But 16GB is way too small for League of Legends. You’ll want to or get a Chromebook with a 32GB or 64GB SSD. The game won’t fit on a bare 16GB drive. That’s a pain point for a lot of Chromebook users.
If you happen to be one of them, I’d strongly suggest getting a Chromebook with more storage capacity. Of course, this means returning or exchanging your laptop. But it really depends on how much of a hardcore fan you are and how bad you want to play LoL on your Chromebook.
Okay, that’s enough for hardware. Now let’s actually get to the steps.
Installing League of Legends on Chromebook
This is where you’re actually going to install the game. This will take anywhere between 2-5 hours (it varies widely), so make sure you have the time set aside because it’ll be difficult to pause it once you get started. (You’ll probably also want to get a Red Bull.)
How this works is pretty straightforward. We’ll be installing a copy of Linux and dual-booting the Chromebook with two operating systems. League doesn’t run on Chrome OS, so it’s going to have to be Linux with a few other tweaks to get it running. To install League, you need to install Linux. To install Linux, you’ll need to install Crouton.
So it goes Crouton > Linux > League of Legends.
That’s about it in a nutshell.
Step 1: Enable Developer Mode
The first step is to switch to Developer Mode.
Note: This is where you’ll want to backup your personal data. All your images, videos, files, and other stuff saved on your Chromebook’s hard disk will be deleted. In essence, your Chromebook will perform a automatically. You can either back up all your stuff using a cloud service like or
Another note: Your Google Account settings, Chrome apps, history, and other user data will be saved on Google’s servers. So don’t worry about that stuff. It won’t get deleted.
Okay, did you backup your stuff? Let’s continue…
So, you’ll need to enable Developer Mode. This lets us bypass a lot of Chrome OS’s built-in security checks so we can install Linux. I’ve already written an , so go ahead- read the guide and enable it. It covers everything step-by-step. Go through the guide and then come back here and continue.
When the whole process is finished, your Chromebook will restart and you’ll see a warning screen when it’s done booting up.
It should say something like “OS verification is off.” That’s normal.
Press “CTRL + D” and your Chromebook will boot into Developer Mode to complete the transition. If you’ve already done this, you can ignore this step.
Are you done yet? Did you enable it? Awesome.
You’ve done well so far. Grab another Red Bull (Blue Edition is my favorite) and let’s rock.
Step 2: Download Crouton and customize your install
Okay, now with your Chromebook in Developer Mode, you can install third-party apps and programs. We’re going to be installing Crouton, which will let us install a copy of Linux. Remember the overview of the installation path we’re taking from earlier? This is the next step.
Installing Crouton is super easy. Go to the GitHub page and download Crouton.
I also strongly suggest It’s important that you use the proper arguments in your code in the next step. In this tutorial, I’ll simply be covering how to install League of Legends on a basic Chromebook.
If you have a touchscreen Chromebook, you may want to add touchscreen support to your installation. Or if you want additional security parameters, you can add that too. The catch is that you need to add additional code. You can refer to the Crouton GitHub page for the exact code you need to type in. But this is optional.
(If you choose not to add anything fancy, you can simply follow this guide and install the basic setup. That’s completely fine too and it should work without issue.)
Step 3: Install Linux on your Chromebook
Here’s where we get to the fun stuff- the code. Now’s where you’ll start seeing some stuff happening.
Don’t fret. It’s very easy.
I’ve typed out all the code you need to input into the command line interface. All you need to do is make sure you don’t mistype anything. And be sure to type them in without any quotations. A single invalid character will throw an error. So if you get errors, be sure that you input the code exactly as shown into the command prompt.
First, you’ll want to open up a command terminal window.
To do this, just press “CTRL + ALT + T” and a window will pop up with some intro text and black background in your browser.
(You should probably memorize this keyboard shortcut for the command terminal because you’ll be using it a few more times throughout this guide.)
Next, type “shell” and press Enter.
You’ll see some more text pop up that states you’re inputting from the localhost. This is where you’ll actually install Linux.
Customizing your Linux installation
The following instructions are completely optional, but it’s probably worth reading just to make sure whether or not it applies to you.
As you may know, there are a ton of different distros of Linux available. By default, Crouton will install the support release of Ubuntu (which is 12.04 or higher) for the operating system. The desktop version will be Unity.
You can completely customize what version of Linux you want, such as Debian, Kali, or the many different versions of Ubuntu (Quantal, Raring, Trusty, Feisty, Gutsy, Hardy, Intrepid, Saucy, Natty, Lucid, Maverick, Hoary, Dapper, and a lot of others). If you’re comfortable with what you’re doing, feel free to install whichever distro you want.
If you want a supported release, you should only consider Precise (12.04), Quantal (12.10), Raring (13.04), and Saucy (13.10). Precise is the stable default installation of Linux with LTS (long-term support).
Along with the Linux distro, you can also customize the desktop you want to install. You can choose from quite a few different versions such as Xfce, Unity, KDE, Gnome, E17, Cinnamon, and LXDE. Each desktop environment has its own user interface, so it’s up to you to decide on how much eye-candy you want and what you’re comfortable working with.
If you’re new to this, you’ll probably want to do some research on the different and And then choose a version of Linux and a desktop environment that works best for you. It’s actually pretty straightforward. Each environment is just a little bit different in its own way.
You should do some research and watch some videos and pick out one that you like instead of following the guide blindly.
It’s strongly suggested that you learn and familiarize yourself with these distros. At least pick one that you can stick with and has decent LTS (long-term support). This will save you time when it becomes time for an update. Instead of breaking the game, you’ll be able to keep playing without a hiccup.
If you want to try installing a different version or desktop, you’d change the code above with your specific choices. The “-r” dictates the release version. The “-t” dictates the desktop UI.
For example, if you wanted to install the Saucy release with the kde desktop, you’d type:
“sudo sh -e ~/Downloads/crouton -r saucy -t kde”
Or if you wanted to install Precise with the Cinnamon desktop:
“sudo sh -e ~/Downloads/crouton -r precise -t cinnamon”
Easy enough, right? You just replace the code with whatever version of Ubuntu and desktop UI you want.
But you should note:
- If you don’t input any -r flag, Ubuntu Precise will be installed by default.
- If you don’t input any -t flag, the Unity desktop environment will be installed by default.
You can also install a whole bunch of other extras following the “-t” flag. For example, you can use any of the following arguments to customize your installation:
- If you want the Chrome browser installed by default, add “chrome”
- If you want keyboard support for the Chromebook’s exclusive keys, add “keyboard”
- If you have a touchscreen and want to use it, add “touch”
- If you want a media player, add “xbmc”
- If you want to be able to copy and paste between Linux and Chrome OS, add “extension”
- If you want to be able to play audio, add “audio”
For example, if you wanted to install Precise with Cinnamon and have touchscreen and audio playback, you’d input the following line:
“sudo sh -e ~/Downloads/crouton -r precise -t cinnamon,audio,touch -e”
Personally, I use the “audio” and “extension” and “keyboard” arguments only. I find that those three additions are the most helpful to keep a Chromebook feeling like a Chromebook and also keeps the process integrated between two operating systems. You can customize your Linux installation however you’d like.
After you’ve chosen a distro and desktop, it’s time to install Linux. To keep this guide as simple as possible, I’ll install a basic version of Ubuntu with the Unity desktop environment.
No customization? No problem.
If you’ve read all that and don’t feel the need to install a customized version of Linux, just go with the default installation of Saucy with unity.
Type the following line of code in the command prompt:
“sudo sh -e ~/Downloads/crouton -r saucy -t unity -e”
This will install the 13.10 version of Ubuntu with some added encryption. I find that it works well with League and the rest of this guide.
Okay, so you’ve typed in your code and Linux should now be installing. This will take about 20-30 minutes. Go take a break. Read up on some to sharpen your artillery strike.
Note: If you get an error that reads:
“WARNING: saucy has reached upstream end-of-life.
That means there will be no package updates available.
You also have to specify a mirror to crouton (-m) for installation to proceed.”
There are two ways you can get around this error.
- You can use a temporary fix that’ll let you advance and continue with the guide. But any future updates may cause the game to not be playable (whether it fails to launch, can’t be played, or any other reason). It’s pretty much like a Band-Aid patch over the wound. It’ll work for now and it’s easy, but it’s not a good solution if you plan to take League seriously on your laptop.
All you need to do is replace the code with:
“sudo sh -e ~/Downloads/crouton -r saucy-rolling -t unity -e”
The only addition is the “-rolling” flag which will install a different version of Saucy. Again, keep in mind that this is only good for a temporary fix. It could suddenly stop working anytime. I only recommend this if you know what you’re doing or you’re familiar with Linux.
- The other technique is that you can download the newest version of Ubuntu with good support. Saucy was used in Ubuntu 13. The newest version of Ubuntu is 16. So quite a few updates have been made to the distro. If you do this method, you’ll end up with a stable solution that’ll give you fewer headaches in the long run. The only catch is you have to install it using a different command (but that’s pretty easy to do- even if you’re not familiar with code).
There are plenty of guides online that’ll teach you how to get the latest version. Just do some quick reading and you’ll be set.
You’ll have to choose which desktop environment you want, but as long as you install Ubuntu, this guide should work just fine. If not, leave a comment and I’ll help you out.
Besides, it’s good to learn a little because you’ll be able to solve issues that arise later on. It’s always better to teach someone how to fish, right?
You can reference
You can check out the for detailed tutorials and a if you get stuck.
And you also search for video tutorials online that teach you how to get it going on your laptop, such as this one:
Step 4: Create the admin account
After it’s done installing, it’ll prompt you to create an admin account. Go ahead and type in a username and password. If you’re bad at remembering this stuff, write it down.
Step 5: Go back to Chrome OS
You’ll have to quickly switch back to Chrome OS to refresh the installation.
Press “CTRL + SHIFT + ALT + Back Arrow” and you’ll switch back to Chrome OS.
Note: The Back/Forth Arrows referred to through this guide are not the arrow keys. They’re literally the back/forward at the top of your keyboard (where the F1-F12 keys are on a Windows keyboard).
After you’ve switched, the installation should be complete.
Step 6: Switch back to Ubuntu
Press “CTRL + SHIFT + ALT + Forward Arrow” and then “CTRL + ALT + Refresh” and you’ll switch back to Ubuntu.
You should now have a brand new desktop environment to play around in.
Familiarize yourself with it. If you look at the launch bar, you’ll see that there’s a folder with the username you created. This is connected to the “Downloads” folder in Chrome OS. Files and media you put in here will be accessible between both operating systems. How convenient is that?
Step 7: Install Synaptic
You only need three applications to play LoL on your Chromebook (besides the game itself). This is one of them.
Right now, your Ubuntu desktop should be pretty bare-bones. You can install other applications if you wish, but for the sake of minimizing error, you should install League of Legends first before you screw around. Even though it may look tempting as you’re installing this stuff, you should avoid it (for now).
To install the Ubuntu Software Centre, you’ll have to install Synaptic. It’s basically a guided user interface (GUI) that makes installing applications a lot easier than doing everything by command line. Unless you’re a regular Linux user.
And to install Synaptic, you’ll need to make sure you’re in Ubuntu.
Look for the button in the top-left corner with the Ubuntu icon. Click on it.
A search box will appear. Type in “term” and you’ll be greeted with the terminal window (yay, more code).
Type in “sudo apt-get install synaptic” and press Enter.
Your laptop will then fetch and install Synaptic automatically. Wait until it’s done.
When it’s done installing, type in the following code in the same window:
“Sudo synaptic” and press Enter.
This will launch the application.
Step 8: Install Ubuntu Software Center
Now that you’ve installed Synaptic, it’s time to install the Ubuntu Software Center.
Launch Synaptic if you haven’t already and then in the search bar, type in “software center.” This will bring up a list of applications, and there are a lot of them.
You’ll need to look for it. When you see it, tick the checkbox next to the app. When you tick it, it’ll also automatically install a few other applications as well. This is normal. It’s because the Software Center requires a few other applications to run properly.
After you’ve ticked it, click on “apply” and it’ll start installing automatically.
When it’s done installing it, you need to launch it.
First, just do exactly as you did with Synaptic (click on the Ubuntu icon and type in “term” to launch the command terminal.
Then type “gksu software-center” and press Enter.
It’ll then launch the Software Center.
Step 9: Install 7zip
Finally, a program you may have heard of before. It’s called 7zip.
We’ll probably need this to unzip the game, though we may end up not using it at all. Let’s download it just in case.
To install it, launch the Software Center and search for “7zip.”
Tip: Try searching for “7 zip” instead if you can’t find it.
After you’ve found it, go ahead and install it. It should be straightforward.
Step 10: Install PlayOnLinux
This is the main application you’ll need to be able to play League of Legends on your Chromebook.
PlayOnLinux will let you run League (and a whole bunch of other games) on Linux OS.
You’ll need to install PlayOnLinux by doing the following:
Open up your command terminal (refer to Steps 5 or 6 if you forgot how).
Type in “sudo apt-get install playonlinux” and press Enter.
Linux will then automatically install the application. Be patient as it may take a while.
(If you’re stuck, you can try asking a question PlayOnLinux at their )
Step 11: Enable Curl on Linux
PlayOnLinux requires curl, which is basically a command that allows Linux to download content from the Internet. You’ll obviously need it to download League.
Once you enable it, it doesn’t require any more user interaction so you only have to do this once. Here’s proof straight from the Linux manual:
curl is a tool to transfer data from or to a server, using one of the supported protocols (DICT, FILE, FTP, FTPS, GOPHER, HTTP, HTTPS, IMAP, IMAPS, LDAP, LDAPS, POP3, POP3S, RTMP, RTSP, SCP, SFTP, SMB, SMBS, SMTP, SMTPS, TELNET and TFTP). The command is designed to work without user interaction.
To enable it, all you need to do is open the command prompt and type in the following:
“sudo apt-get install curl” and press Enter.
This will enable curl on your copy of Linux so you can download League of Legends.
Step 12: Download and Install League of Legends onto your Chromebook
This is where you’ll actually be downloading the game.
Are you pumped yet? If not, go watch some OddOne or Voyboy on and then come back. (Not that I see how that’ll get you pumped to play LoL on your Chromebook.)
Anyway, open up the command terminal and type the following:
“playonlinux” and press Enter.
It’ll start loading up and it’ll probably take a few seconds.
When it’s done, look at the menu bar and find the “testing” box. (This text may have changed since then.)
Search for “league of legends” and it’ll pop up. Click on it to launch it and go through the on-screen prompts. You’ll see a whole bunch of warnings and errors thrown at you, but it’s okay. Just ignore them and continue clicking “next.”
The game will start to install when you’re done going through all the prompts.
Step 13: Wait (and keep your Chromebook awake)
This step takes a while and is pretty important so I made it into its own step.
When the game is installing, it’ll take a pretty long time. Like, several hours long. Or even days (YMMV).
The issue is that Chromebooks have a set sleep timer. Even though you’re running in Ubuntu, your Chromebook will still enter sleep mode. If your laptop goes to sleep, it’ll freeze and crash the client. If this happens, you’ll have to start over from Step 11.
To stop your Chromebook from entering sleep mode, you have several options:
Option 1: Constantly touch the trackpad every few minutes to keep your Chromebook awake.
I really don’t recommend this because you’ll literally be stuck with your Chromebook for hours. Unless that’s your thing.
Option 2: Install Crouton integration (and play League of Legends in a browser tab)
This is pretty awesome.
It’s an app that’ll basically launch Crouton in a single tab on your Chrome browser. It basically takes the whole experience and puts it in a tab on your browser.
You can download League while you surf the web, watch movies, do homework, or whatever else you do while the game downloads in the background. This minimizes effort and keeps you productive (and reduces your time required to set this whole thing up).
Even more awesome is that you can even play the game in that single tab. You can full screen it and launch the game. It’s like playing a web-based version of League. You need to try it to believe it.
In fact, some of you will probably want to go this route even after it’s done installing.
Here’s how:
Get the
(It’ll save to your “Downloads” folder. It doesn’t matter if you’re in Chrome OS or Linux, as the file can be accessed by both operating systems if everything was installed properly.)
Enter Chrome OS if you haven’t already (press “CTRL + SHIFT + ALT + Back Arrow”).
Open the command prompt by pressing “CTRL + ALT +T” and press Enter.
Type “shell” and press Enter.
Type: “sudo sh ~/Downloads/crouton -t xiwi -u”
When it’s done installing, it’ll launch itself in a tab on your Chrome browser. From here, you can continue with the next step.
Option 3: Install Crouton Integration and Keep Awake
This option takes Crouton Integration a step further.
Even if you have the game downloading in a background tab, it’ll still take hours or days (I’m not kidding).
A smarter option is to just download a Chrome Web Store app called Keep Awake. This does exactly what it says- it keeps your Chromebook awake. You can leave your Chromebook on overnight to download League rather than babysitting it all day (and/or night).
You can watch your movies, surf the web, do your homework, and then go to sleep and your Chromebook will stay awake and continue downloading.
All you need to do is get it and install it to Chrome.
(If you need instructions on setting it up properly, I wrote a )
Either way, it’s up to you. You can choose any of these options or make up your own. The point is to keep your Chromebook awake when it’s downloading the client. Don’t let it enter sleep mode. It’ll freeze the game install and you’ll have to restart.
Also, the game will probably freeze a few times during the installation. It usually happens when there’s just about 250mb left to download. This is completely normal.
It’ll appear to be frozen, but it’ll soon resume afterward. Be patient.
With Riot’s new game launcher, it seems to happen less often. So this may or may not apply to you.
Step 14: Error
After it’s done installing, you’ll see the launcher with an error.
This is normal. It’s part of the installation process on a Chromebook. You’re bound to get a few errors here and there.
You’ll see an option to play League of Legends with an automatically check-marked box. Uncheck this box and then close the launcher.
Note: It’s important that you make sure you the box isn’t ticked. You do NOT want to launch the game. If you do launch it by accident, you can continue to see if it’ll work. If not, you’ll need to uninstall LoL and try this step again.
Step 15: Fix the error
Now we’ll fix the problem.
Open up PlayOnLinux and look for the “Tools” menu. Click on it. Look for the PlayOnLinux console option and launch it.
After you launch it, you’ll see a command line (I told you there would be a whole lot of code, but don’t worry, I got you covered).
Type in the following command:
“POL_Config_Write NO_FSCHECK TRUE” and press Enter.
It’ll then turn off error checking. Close the PlayOnLinux console when it’s done (it should be instant).
Step 16: Install the game again
This is the last time you’ll have to install LoL.
Go ahead and try installing the game again (refer to Step 11 if you need help) and it should install without any errors being thrown.
Since you’ve already installed the game once, it’ll ask if you want to overwrite the League of Legends installer. Go ahead and choose the “overwrite” option. You’ll want to do so.
After it launches and the game installer pops up, click on the “repair” option. It’ll then continue to install and repair the game. It should take a few minutes. Be patient.
After it’s done installing League, you can exit the installer.
Step 17: Play League of Legends
Click “Play” and launch the game!
(Gasp.)
It’s finally time…to enter the Fields of Justice
Go ahead and launch the game.
If you still have the launcher open, you can launch the game by ticking the box (yes, it’s OK this time) to automatically run the game.
Note: Don’t tick the “Remember me” box. This will likely throw errors. You’ll have to type in your credentials every time when you log in.
If you’ve exited the launcher, you can do so by simply launching from your applications menu using the shortcut, or by using the command prompt (which you should have a grasp on using by now, if not, refer to any of the earlier steps that utilize the command prompt).
If the game works, congrats. You’ve just installed League of Legends on your Chromebook. It’s time to “R” the out of that squishy LeBlanc.
If not, check out what errors are being thrown and try again. It could take a few tries before it works. Sometimes the game will install and run on the second attempt even if you did the same exact thing as the first attempt.
If not, you need to mess around with the settings, do some research, and ask around in some forums. I’m afraid there’s no “universal solution” to getting the game installed and running, so it widely varies depending on your situation.
Sometimes you need to initiate a full repair. Other times you need to reinstall the game. If you really want this game to work, you’ll have to try multiple times.
It’s annoying and frustrating, but for some magical reason it works after you’re about to give up. It really depends on how much you want to play LoL on your Chromebook.
Try redownloading. Try reinstalling. Try repairing. There are a ton of reasons why it won’t work. Don’t waste too much of your time doing this though. Just initiate the task and go do something else. It’s always a shame to wait overnight for it to install and see that it doesn’t work.
Remember, we’re trying to get League to run on a device that was never meant for it to run on. And we’re doing this by hacking our way through it with different applications. It’s not exactly a cakewalk.
There are a few common problems that users get when trying to install the game. I have some solutions to troubleshoot these issues in a later section.
You can also post your error(s) here in the comments and I’ll see if I can help you out.
Improving League of Legends performance and FPS
Okay, so now that you’ve gotten League of Legends running on your Chromebook, you may notice that performance isn’t up to par like you’d expect.
Believe it or not, League is more CPU-intensive rather than GPU-intensive. In other words, the game requires more system resources from your processor rather than the graphics card.
However, Chromebooks don’t have dedicated graphics cards (at least not yet). Therefore, all the game processing is done with the Intel HD graphics coprocessor.
This isn’t a discrete graphics card, but rather a portion of the CPU used for rendering games, videos, and other motion-heavy applications.
Again, League of Legends doesn’t really use a lot of the GPU, so worry about Chromebooks having no dedicated video card. The Intel HD graphics is suitable. It’s all about the CPU.
To increase performance and squeeze out more frames on your Chromebook, you’ll want to do the following to get a significantly better FPS in League of Legends:
- Turn character quality, shadows, environment quality, and effects quality to the lowest setting
- Turn off anti-aliasing
- Turn resolution down to the lowest playable setting for you
- Turn off all unnecessary effects
- Turn off help tips
- Turn off combat text
- Turn off alerts
- Turn off health and resource bars
- Turn off ability and attack displays
- Turn off player names
- Turn off all UI display text
- Scale the UI to be as small as possible
- Turn off minimap movement
- Turn off all sound (if you can play without audio)
- Turn on frame rate capping (for smoother frame rates and fewer fluctuations)
- Play in a small window
You can get more FPS easily
Doing these will give you a noticeable performance boost in the game. With these settings, I go from a measly 3-12 FPS to about 22-25 FPS on my Acer CB3-131 (Intel Celeron CPU, 2GB RAM) on the lowest settings.
This particular laptop is pretty dated by today’s newer Chromebooks. I can play the game, but not competitively. Of course, a stable 30 frames would be nice, but the Chromebook isn’t equipped with powerful hardware.
So it’s safe to assume your basic Chromebook with an Intel Celeron processor and 2GB of RAM will net you on about 22-25 FPS on the lowest settings. Is this playable? Yes, but it’s not ideal. But if you’re just trying to get your League fix, then it’s worth it.
Of course, if you have a newer Chromebook, you should have a nice performance boost over older ones.
I also tried playing League of Legends on a modest Acer c270p Chromebook (Intel Celeron CPU, 4GB RAM, 32GB SSD) which I borrowed from a friend. I got about 20-40FPS with heavy fluctuation. I netted 30 FPS on average. During team-fights, it drops down to about 20-25 FPS with human players. It’s a lot smoother and playable than the Acer CB3-131.
If you have a newer laptop, you’ll probably be able to get an average 30 FPS out of it. Definitely playable. A lot of them now come with 4GB of RAM like it’s the new standard. They also have higher resolution screens and convertible form factors as well.
If you haven’t bought a Chromebook yet and you’d like to play League on it, I’d suggest getting one with an i3 or i5 CPU with at least 4GB of RAM and 32GB of SSD storage. Also,
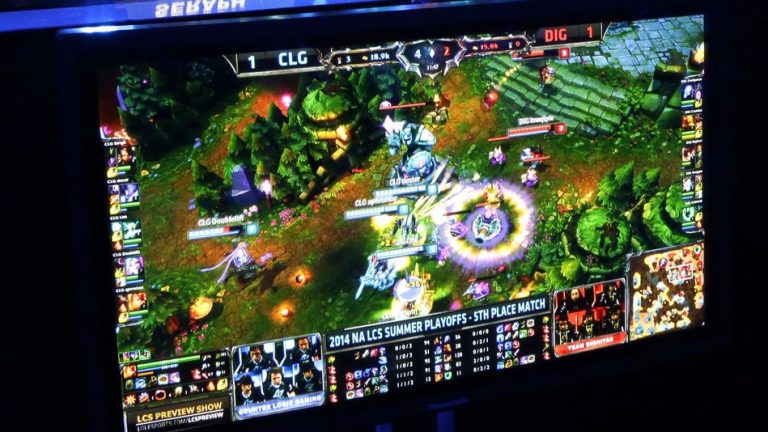
Playing LoL on an 11.6’’ screen isn’t really that nice.
If you have a spare computer monitor or TV, you can for a bigger picture. Or you can also
Troubleshooting: Can’t get it to work?
If you’re having problems getting the game to install, here are a few common issues and solutions to (possibly) fix them.
Try using Lutris
If PoL doesn’t work after you’ve tried everything you could think of, you may want to try using a different game launcher.
Specifically, you should give Lutris a try.
is another game library similar to PlayOnLinux and Steam that has built-in support for LoL.
Installation is pretty easy.
Just launch the command prompt and type the following code to set up the repository (no quotes, one entry per line):
“ver=$(lsb_release -sr); if ; then ver=16.04; fi” and hit Enter.
“echo “deb http://download.opensuse.org/repositories/home:/strycore/xUbuntu_$ver/ ./” | sudo tee /etc/apt/sources.list.d/lutris.list” then hit Enter.
“wget -q http://download.opensuse.org/repositories/home:/strycore/xUbuntu_$ver/Release.key -O- | sudo apt-key add -“ and hit Enter.
Linux will then set up the repository for Lutris.
If you get an error, you can check out this
When it’s done, you can install Lutris by running the following code:
“sudo apt-get update” and hit Enter.
“sudo apt-get install lutris” and press Enter.
After it’s installed, launch it and then install LoL from
Follow the on-screen prompts and you should be able to play League using Lutris.
This should fix a few problems you may be having with PlayOnLinux, such as the patcher buttons not working or the game not launching/installing.
League of Legends Patcher gets stuck
If the patcher gets stuck, there a few ways you can deal with this:
Don’t let your Chromebook sleep
Make sure your Chromebook doesn’t go to sleep when it’s patching or downloading the game. I’ve covered this above and provided a few solutions to remedy the installer getting stuck. Please refer to Step 12.
Reinstall League using a copy from Windows
This solution requires a bit more work. But if you want to play it enough, you may want to give it a shot.
Note: The following steps assume you’ve already gone through this guide and you have a working version of Linux and PlayOnLinux installed.
We’re going to try to copy a version of League from Windows onto your Chromebook.
Here’s how:
Step 1: Download League onto a Windows-based computer. You can get the latest client
Step 2: Copy the game onto an external hard drive, SD card, or flash drive.
Step 3. Launch PlayOnLinux on your Chromebook.
Step 4: Insert your external hard drive, SD card, or thumb drive into your Chromebook.
Step 5: Within PlayOnLinux, look for the League of Legends files on your device you just connected. Find the installer file.
Step 6: Double-click on the installer file to install the game again.
Step 7: Choose to “overwrite and repair” the game.
Step 8: Let the game install and patch.
The game should now finish installing and should be playable.
I followed the guide exactly, but it’s still not working
You should definitely try again- whether you do the same exact steps or mess around with it.
That’s where everyone gets lost and has to find a solution that works for them to get it working.
You can try messing around with the settings, trying a combination of different solutions, or even try looking it up online or post in a forum for any solutions.
You can also try posting your error here and I’ll see if I can provide any help.
The game should now be patched and installed and ready to play.
The game runs with very low FPS or has weird texture problems
First, I’d suggest for you to try all of the suggestions in the section above dedicated to improving FPS.
If you’ve done that and you’re still getting low frames, you can try the following:
Step 1. Launch PlayOnLinux
Step 2: Click on the “Miscellaneous” tab
Step 3: Find the section labeled “Command to exec before running the program”
Step 4: Look for the text field.
Step 5: Type the following (without quotes):
“force_s3tc_enable=true playonlinux”
This should fix your textures and give you a slight performance boost in FPS.
Remote streaming from a PC to Chromebook
A last resort is to simply stream League from a Windows PC.
Setting up a . You’ll basically be controlling your Windows computer using your Chromebook and you can play the game remotely.
All the processing power and rendering is done on your PC, so it doesn’t really require any powerful hardware. You’ll be able to play the game relatively smoothly with decent FPS if assuming your Chromebook isn’t too underpowered.
Sound good?
All you need to set up a stream are the following:
- Windows PC with League of Legends
- Chromebook
- Chrome Remote Desktop app (completely free)
- A pretty fast Internet connection (going both ways)
It all really depends on your connection speed. If you have a fast connection, you’ll be able to play the game with little-to-no latency.
For most gamers, I assume you’re going to want to play away from home (because if you’re at home, you’d just play on your PC). That’s kinda the point of having a laptop- for portability and so you can play LoL on-the-go.
The app lets you connect to your home PC anywhere in the world. It works by connecting your Chromebook and PC via a remote connection based on an Internet connection (not a local area network (LAN) connection).
So, if you have fast Internet at home but a slow connection using the free WiFi at your favorite cafe, it’ll bottleneck and the game will be slow.
So you need to think about it on both ends if you want a fast, playable session of League.


Comments
There are no comments yet